9 sewing tips for successful toymaking

Sew toys: 9 tips for success

These tips are great automatic habits to have when sewing a doll, stuffed animal or a PLUSH LIFE® bear. These few tips will help you achieve your personal best results every time.

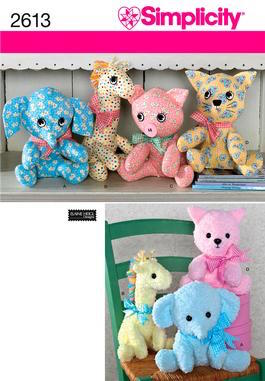
If you are looking for a good start up toy project to sew, check out the super easy 2-piece animal patterns by Elaine Heigl Designs for Simplicity. Millions of 2 piece animal patterns have sold around the world. Their popularity is due to the simplicity of the construction with great results. If you haven’t made one or two already, consider sewing up a few! The PLUSH LIFE® bear is a similarly designed easy-to-sew project that can be sewn up within an hour.  


Set up for a happy sewing experience


On the ready: handy tools

These little tools are great to always have nearby when sewing.

A long needle is a helpful aid to help guide fabric when stitching tight curves and corners, or something with a little bulk. A long needle is great for some extra precision.

Clipping scissors are good to have at hand to cut threads after stitching a seam. The set shown is my personal fave!


Visual guide for 1/4” seams

It’s important to have a good visual guide to view a seam width. You can use a special foot for 1/4” seams, or you can mark a visual guide with a piece of white tape. With a visual guide you will always be sure that your seam is the proper width.


Sewing curves and corners, oh my!


Mark pivot points and dart

When you stitch your very first bear, you may want these handy target marks. With experience, you may not need to do this anymore. Up to you!

Stitching a corner or a curve

Stitch up to target mark, insert needle, lift foot, pivot fabric, lower foot, continue!

When stitching a curve, stitch several stitches, pivot, repeat. You will get the feel for this with a little  practice.


Clip curves and corners

This is a must! Clip into corners and curves as shown. This allows the toy to turn to the outside smoothly. 

Clip, clip!

For seams with outer curves, little pie shape clips help to reduce bulk.

Some extra good habits for sewing excellence!

Hold thread ends when starting to stitch

This is a valuable tip that I learned from a quilter. This is a really important habit to have when you stitch 1/4” seams!

When you start stitching a seam, hold the thread ends firmly, but do not pull. Once you have moved forward a few stitches you may need to gently pull the thread ends to assist moving the project along.


That long needle is a helpful guide

Some places a long needle is just so handy! Once you start using it, you will be happy it’s always sitting nearby.

When sewing plush fabric, a long needle is super handy! Observe this demo to see how.

PINNING

When pinning pieces together, it’s a good habit to pin corners and notches together first.

The printed sides of fabric face inside, unless otherwise specified.

Avoid stitching over pins if you can, so try to remove them as you sew. Always give a final check to make sure all pins are removed upon project completion.

.

ACTION!

Ready to start? Here are some videos to check out.

“Cut it out” is a short demo showing the Cut&sew panel being cut out.

“Stuff it” is a demo about stuffiing a plush animal.

Enjoy!

Check out these videos to vew cutting and stuffing technique.

If doll making is your preference, check out this post, Doll Design: create yours!

Sew happy! E


Sew a little love!

Sometimes it’s a bit of a challenge to have a child agree to sleep for the night. A bedtime ritual of reading a story is always great, but as I experienced it sometimes wasn’t enough.  A little scenario with a sweet bear can be part of that bedtime ritual.  A little nurturing with a bear, then a tucking in, may successfully finalize that sleepy time mood!


Grooming biscuit bear with a soft baby brush.


 To discover how to sew and experience the PLUSH LIFE®, click the link below.

Sweet dreams! E


Start Sewing!

Greetings! This little post is ment to encourage new stitchers. If you are already experienced, perhaps consider mentoring a new stitcher!

Sewing is an amazing hobby, in that from a simple piece of cloth you can make something useful or fun. Getting started may seem daunting at first, but there are so many excellent sources where you can pick up basic skills to get started.

You don’t need much to begin sewing. A sewing machine is the biggest investment, but they are readily to be had used or new. Start with a simple machine. If you become passionate about sewing then trade up to a machine with more features.

  • Watch a video about the basics of a sewing machine. Threading a machine, winding and inserting a bobbin are some basics you need to know.
  • practice stitching a simple shape, such as circles, squares and hearts. Practice stitching on some cloth or a piece of paper. You can find a heart template and project on this site.
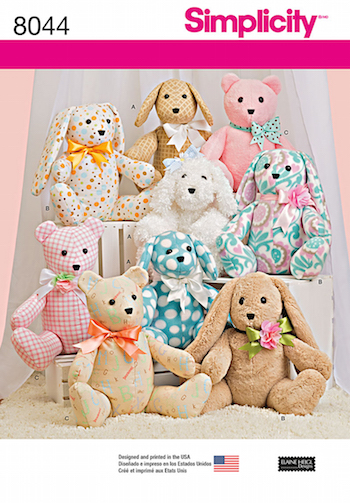
  • Consider sewing an easy first project such as 2 piece animals, a great beginner project. If you prefer to sew clothing, lounge pants are another easy project to use your new skills.
 

Be a sew and sew! E

Sweater revival

Sweater season is upon us, and it’s time to access last years wardrobe favorites. Some sweaters might not make the cut,  but might be contenders for a repurposing  project.

Sometimes a long loved sweater can become so “natty” with use, it looks too sad to wear in public. But with a little grooming you can bring many sweaters back to their original glory.

If a sweater has fuzz-balls, skim them off with a fine tooth comb.


If a sweater’s fibers are a little “natty”, brush the knit with a fine bristle brush. I was lucky today at a discount store and found a boars hair bristle brush, perfect for this purpose! Now, with hardly any effort, my sweaters from last year are all keepers!

Enjoy the fall! E


Huggable Lovable dolls to sew

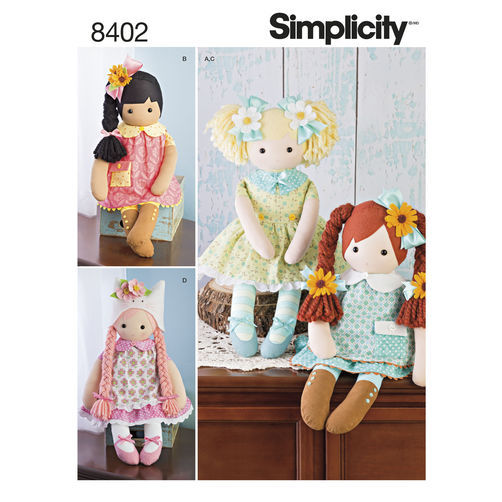
One of my favorite career experiences was as a doll designer. So much fun! You too can have that same fun by styling and sewing one of these soulful cuties (Simplicity 8402) to adorn a girls bed or to be a take-everywhere-friend.

The jumper, skirt and collar for these dolls are so easy to make. Perfect for a shared project with a young stitcher. For additional creativity and with some finessing, 18″ doll clothes can be adjusted to fit these girls. Have fun being a doll designer too!

Doll skin fabric is available at the print-on-demand site Spoonflower.com.

Sew fun! Sew playthings! Elaine

Vintage inspired fashion for 18″ doll clothes

8072


Rock and roll!

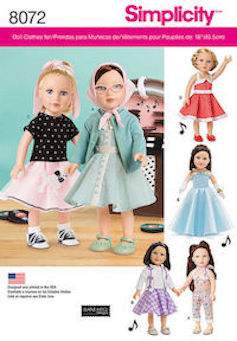
These little outfits are inspired by the rock and roll era of the 1950s. Get ready for school, prom, or a sock hop with this 18″ doll fashion pattern pack.

This pattern, Simplicity 8072, includes a sweet classic cardigan sweater. For a sweater knit you can repurpose a fine gauge sweater or socks as shown on the pattern photo.

Below is a brief tutorial on how use sweaters and socks to make these sweet separates.


Make sweaters with socks

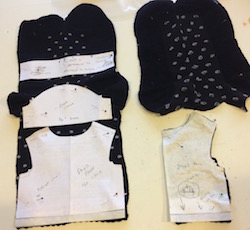
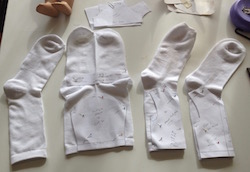
An extra special doll sweater can be made using an adult crew sock or a fine gauge sweater. Strategically place the pattern hemlines as shown below.


sock 2

Use one pair of crew or long socks for a short sleeve doll sweater. Notice hemlines are placed along the finished edges of socks where possible. Carefully plan layout to fit pattern pieces.


sock 3

Use two pairs of adult crew or long socks for a long sleeve sweater.


Make a doll sweater with a thrift store find

repurpose

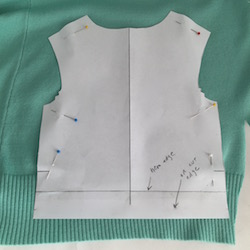
This is cut from a fine gauge sweater found at the thrift store. The cutting layout above is planned to utilize the sweater’s ribbing for a realistic look.


Rock and Roll!