Sew 18″ doll clothes: repurposed fashion

When shopping for 18″ doll fashion sewing projects, consider thrift stores, consignment, and discounted fashion as some unique sources to find some special fabric contenders. Below are just a few repurposed finds that were used to create special 18″ doll wardrobe pieces.

The pullover sweater made from a pair of leg warmers. The lacy skirt was made using a discarded cami top. The leggings were made using crew socks. (Click: Leggings from socks PDF pattern for a free pdf pattern).


Sweaters and socks are great to repurpose to 18″ clothing. For a most realistic 18″ doll sweater, seek lightweight (fine gauge) sweaters. On a recent visit to a thrift store I shopped through a sea of choices!

Strategic placement of the pattern can make use of  the sweater textures and give a realistic look to doll clothing.


Tip: Iron on featherweight knit interfacing can make sewing with knits easier for a beginner stitcher.

Iron on feather weight knit interfacing applied to wrong side of sweater knit.


Below are twin sets made using Simplicity 8072. The green cardigan is made from a fine gauge sweater from a thrift store. The black and white dot t-top is made from a pair of socks!


Before you discard fashion pieces from your closet, consider making them into doll clothes!

For some additional tips on sewing a mini wardrobe, check out this earlier post: Success Tips for sewing 18″ doll clothes.

SEW EASY mini pin cushion
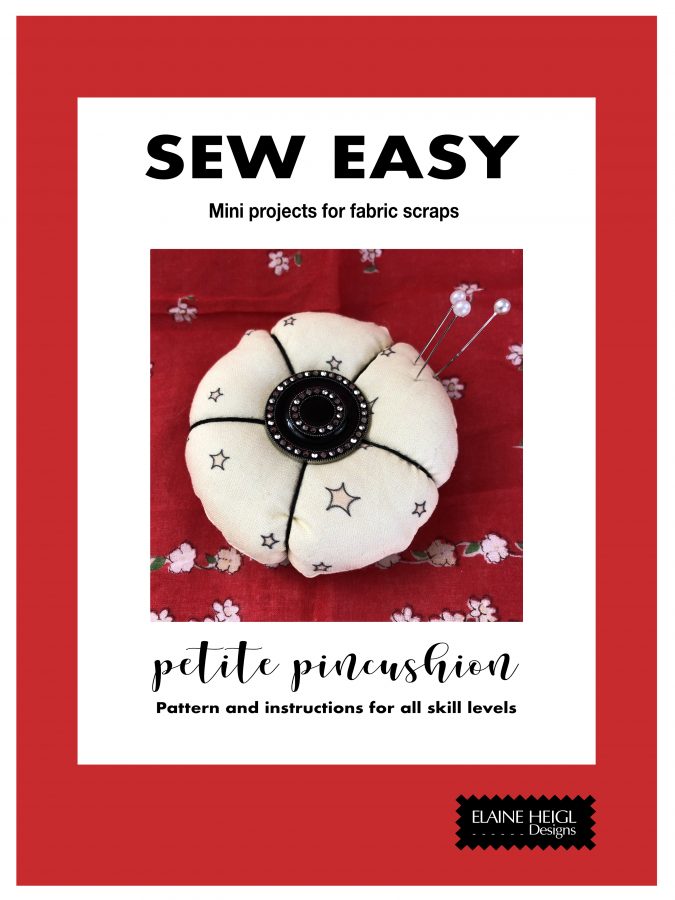
SEW EASY ONE PIECE PATTERNS

Sew up cute little pincushions! This quick and easy sewing project is perfect for a brand new stitcher to take a sewing machine for a little spin! If you are an experienced stitcher, this is a nice little project to introduce sewing to someone who is curious to start.

To begin this project, download the pdf pattern with instructions, and gather some fabric scraps. You just need some basic tools and equipment to start sewing. This project also can be easily stitched by hand.


If you enjoy one piece patterns for a quick sew or for mentoring a new stitcher, check out the SEW EASY bow tie clip for another project.
WHAT INSPIRED EASY SEW ONE PIECE PATTERNS

If you are a customer or designer of Spoonflower.com, such as myself, you often want to order a fabric 8″ square test swatch to proof the colors and quality of a design. These little squares can accumulate into a bit of a stack over time. Inspired by my test squares, I decided to create some little “useful” patterns that fit within those squares for Spoonflower fans to use.


If you are a seasoned stitcher, beginner or just curious about sewing and fabrics, check out spoonflower.com. Perhaps order some fabric test swatches there and sew up some of these little bow ties and pincushions. Nice as mini surprise gifts. Enjoy!

SEW AND SEW! E


Sew a sweet bow tie clip

SEW EASY ONE PIECE PATTERNS

Sew up cute little clip on bow ties for a girl, her doll, or stuffed animal. This quick and easy sewing project is perfect for a brand new stitcher to take a sewing machine for a little spin! If you are an experienced stitcher, this is a nice little project to introduce sewing to someone who is curious to start.

To begin this project, download the pdf pattern with instructions, and gather some fabric scraps. You just need some basic tools and equipment to start sewing. This project also can be easily stitched by hand.


Inspired!

If you are a customer or designer of Spoonflower.com, such as myself, you often want to order a fabric 8″ square test swatch to proof the colors and quality of a design. These little squares can accumulate into a bit of a stack over time. Inspired by my test squares, I decided to create some little “useful” patterns that fit within those squares for Spoonflower fans to use.


If you are not familiar with spoonflower.com, it is a print on demand fabric and wallpaper source where many independent designers list their surface art available for anyone to purchase. Check it out! A lot of amazing talent there!

At my Spoonflower shop I started out with cut-and-sew PLUSH LIFE® animals and their clothing. Super easy for a beginner’s sewing experience. Sew one up for a special friend or occasion. Perhaps treat a cut-and-sew panel to a sewing hobbyist. 


On my Spoonflower adventure I’ve also been having fun designing sweet mini prints scaled for dolls and stuffed animals. With these prints you can sew matching outfits for the cut-and-sew animals and their people friends.


If you are a seasoned stitcher, beginner or just curious about sewing and fabrics, check out spoonflower.com. Perhaps order some fabric test swatches there and sew up some of these little bow ties. Enjoy!

SEW AND SEW! E


Print on Demand cut and sew fabric panels

Cut-and-sew fabric panels are a great way to quickly sew up an adorable animal or doll! 

With merely one fat quarter fleece fabric panel you can make a sweet bear, cat or doll blank. Want to dress them up? Fat quarters to make clothing are also available. 

View and order my cut-n-sew panels and unique fabric designs at the print-on-demand source, Spoonflower.com 

For thorough information about purchasing and ordering cut-and-sew projects: Click here 

Your hand-made gift will be treasured!


9 sewing tips for successful toymaking

Sew toys: 9 tips for success

These tips are great automatic habits to have when sewing a doll, stuffed animal or a PLUSH LIFE® bear. These few tips will help you achieve your personal best results every time.

If you are looking for a good start up toy project to sew, check out the super easy 2-piece animal patterns by Elaine Heigl Designs for Simplicity. Millions of 2 piece animal patterns have sold around the world. Their popularity is due to the simplicity of the construction with great results. If you haven’t made one or two already, consider sewing up a few! The PLUSH LIFE® bear is a similarly designed easy-to-sew project that can be sewn up within an hour.  


Set up for a happy sewing experience


On the ready: handy tools

These little tools are great to always have nearby when sewing.

A long needle is a helpful aid to help guide fabric when stitching tight curves and corners, or something with a little bulk. A long needle is great for some extra precision.

Clipping scissors are good to have at hand to cut threads after stitching a seam. The set shown is my personal fave!


Visual guide for 1/4” seams

It’s important to have a good visual guide to view a seam width. You can use a special foot for 1/4” seams, or you can mark a visual guide with a piece of white tape. With a visual guide you will always be sure that your seam is the proper width.


Sewing curves and corners, oh my!


Mark pivot points and dart

When you stitch your very first bear, you may want these handy target marks. With experience, you may not need to do this anymore. Up to you!

Stitching a corner or a curve

Stitch up to target mark, insert needle, lift foot, pivot fabric, lower foot, continue!

When stitching a curve, stitch several stitches, pivot, repeat. You will get the feel for this with a little  practice.


Clip curves and corners

This is a must! Clip into corners and curves as shown. This allows the toy to turn to the outside smoothly. 

Clip, clip!

For seams with outer curves, little pie shape clips help to reduce bulk.

Some extra good habits for sewing excellence!

Hold thread ends when starting to stitch

This is a valuable tip that I learned from a quilter. This is a really important habit to have when you stitch 1/4” seams!

When you start stitching a seam, hold the thread ends firmly, but do not pull. Once you have moved forward a few stitches you may need to gently pull the thread ends to assist moving the project along.


That long needle is a helpful guide

Some places a long needle is just so handy! Once you start using it, you will be happy it’s always sitting nearby.

When sewing plush fabric, a long needle is super handy! Observe this demo to see how.

PINNING

When pinning pieces together, it’s a good habit to pin corners and notches together first.

The printed sides of fabric face inside, unless otherwise specified.

Avoid stitching over pins if you can, so try to remove them as you sew. Always give a final check to make sure all pins are removed upon project completion.

.

ACTION!

Ready to start? Here are some videos to check out.

“Cut it out” is a short demo showing the Cut&sew panel being cut out.

“Stuff it” is a demo about stuffiing a plush animal.

Enjoy!

Check out these videos to vew cutting and stuffing technique.

If doll making is your preference, check out this post, Doll Design: create yours!

Sew happy! E